Wallabag - with MySQL and RabbitMQ
I have always wanted to have my own, searchable copy of web pages I'd liked or read. Never before did I have a tool I'd be satisfied with. I even wrote one myself in Python, but since that didn't end up as planned, I'd abandoned it. (I have wanted a small and portable app, producing a portable archive - turns out that much of the middleware I had wanted to use doesn't exist in small and portable versions and would have to be installed as extra dependencies, which I really did not want to require.)
This week I have discovered Wallabag - an app that is very close to what I want it to do. It's open-source, there's a 14-day trial version to try online, and you can either pay a few € per year for the service or host it yourself. Since this is the kind of data I want to have under control, I opted for self-hosting.
This is the second time that my wilful ignorance regarding anything PHP-related prevented me from even installing an app. But this time I asked around and found many friendly people over at their Gitter who have helped me do it. It was a struggle, but it seems to be working now. I'm still trying to import all of my data - the importers keep stalling without any visible error (approximately every 10 minutes) or crashing, so it's far from smooth sailing. We'll see how it goes.
Here is (hopefully) everything I had to do get it running. (Most of it is in the docs, but strewn over multiple places; I managed to overlook some of them. So here they are, all in one place.
Prerequisites
Wallabag needs a database (I use MySQL though Postgres or SQLite are also available), a server, and PHP.[1] I already had nginx installed, so I needed to get PHP. Wallabag's installation docs say you only need to do make install, but that only got me errors - first complaints about missing Composer, then worse ones about missing modules. I haven't been able to install them going by just PHP CLI's docs (I'm using PHP 7.0) - until the good folks at Gitter told me they are also available on apt. So all the dependencies you need should be installed with:
sudo apt-get install php-fpm php-mysql -y
sudo apt-get install php-curl php-mbstring php-bcmath php-xml php-gd php-zip -y
Then go to where you want your app to live (in my case, /var/www/) and clone the repo.
git clone https://github.com/wallabag/wallabag.git
cd wallabag
The docs say to just install now - maybe that would work if you had Composer installed globally? - but I had to download it. I won't list the entire code here because it changes with each release, but eventually, you will get to :
sudo php composer-setup.php
Installation
That should take care of all the prerequisites. In the wallabag folder, run:
make install
It will prompt you for config info and the name of Wallabag's admin credentials.
I will be using Rabbit, but because of vhost issues, I will have to rewrite config anyway, so I just ignored them.
I just gave the install script MySQL root user access to create whatever it needed, then created a dedicated user and only gave it rights to that single database. (And of course, entered its credentials in app/config/parameters.yml.)
CREATE USER 'wallabag'@'localhost' IDENTIFIED BY 'password';
grant all privileges on wallabag.* to wallabag@localhost;
Your server needs to have access to all the relevant files and folders. I assigned them to www-data user and group with sudo chown -R www-data:www-data <folder-name-here>.
Server configuration
In the meantime I made a DNS record pointing at my server, then I had to configure nginx. I more or less just copied the sample config file - it did exactly what I needed it to. I saved it to /etc/nginx/sites-available/wallabag.zble.sk.conf.
server {
    server_name wallabag.zble.sk;
    root /var/www/wallabag/web;

    location / {
        # try to serve file directly, fallback to app.php
        try_files $uri /app.php$is_args$args;
    }

    location ~ ^/app\.php(/|$) {
        fastcgi_pass unix:/run/php/php7.0-fpm.sock;
        fastcgi_split_path_info ^(.+\.php)(/.*)$;
        include fastcgi_params;
        # When you are using symlinks to link the document root to the
        # current version of your application, you should pass the real
        # application path instead of the path to the symlink to PHP
        # FPM.
        # Otherwise, PHP's OPcache may not properly detect changes to
        # your PHP files (see https://github.com/zendtech/ZendOptimizerPlus/issues/126
        # for more information).
        fastcgi_param  SCRIPT_FILENAME  $realpath_root$fastcgi_script_name;
        fastcgi_param DOCUMENT_ROOT $realpath_root;
        # Prevents URIs that include the front controller. This will 404:
        # http://domain.tld/app.php/some-path
        # Remove the internal directive to allow URIs like this
        internal;
    }

    # return 404 for all other php files not matching the front controller
    # this prevents access to other php files you don't want to be accessible.
    location ~ \.php$ {
        return 404;
    }

    error_log /var/log/nginx/wallabag_error.log;
    access_log /var/log/nginx/wallabag_access.log;
}
You need to activate the site, verify everything is correct and finally restart nginx.
sudo ln -s /etc/nginx/sites-available/wallabag.zble.sk.conf /etc/nginx/sites-enabled/
sudo nginx -t
sudo service nginx restart
Do not skip the nginx -t test step. I only had a single innocuous warning about a weird character in my server name; turns out I forgot the terminating ; which would cause trouble if I just went directly for the restart.
You can now access the webpage to see if it's live.
Next step is to enable SSL. I don't want any of my sites even accessible via plain HTTP. With LetsEncrypt's certbot it's a breeze: with the --nginx flag I automatically get a cert and appropriate config modifications to use it. (I generated a longer Diffie-Hellman key when I did the initial setup, so I need not do it now.) Then just test the config and restart nginx.
sudo certbot --nginx -d wallabag.zble.sk`
sudo nginx -t
sudo service nginx restart
During the process, certbot asked:
Please choose whether HTTPS access is required or optional.
-------------------------------------------------------------------------------
1: Easy - Allow both HTTP and HTTPS access to these sites
2: Secure - Make all requests redirect to secure HTTPS access
-------------------------------------------------------------------------------
Select the appropriate number [1-2] then [enter] (press 'c' to cancel): 2
The appropriate server block is already redirecting traffic. To enable redirect
anyway, uncomment the redirect lines in
/etc/nginx/sites-enabled/wallabag.zble.sk.conf.
I did select #2, but it didn't work: the appropriate section was generated and present in the config file, but was commented out. Uncommenting it was enough.
If you don't intend to import a lot of data, you can stop now and enjoy your fresh instance. Yay! If you want to use RabbitMQ, read on.
After logging into Wallabag, I turned these on in Internal settings:
- Article > Enable if wallabag stores HTTP headers for each article[^Just because, okay? I just want them.]
- Import > Enable RabbitMQ to import data asynchronously
- Misc > Download images locally. This is an absolute must.
I also made sure that in the Misc section, the Enable demo mode? is 0 and Demo user name is changed, just in case.
Import queue setup
This is the sketchiest part of the whole setup. I was greeted by this message:
RabbitMQ is enabled for handle asynchronous import but it looks like we can't connect to it. Please check RabbitMQ configuration.
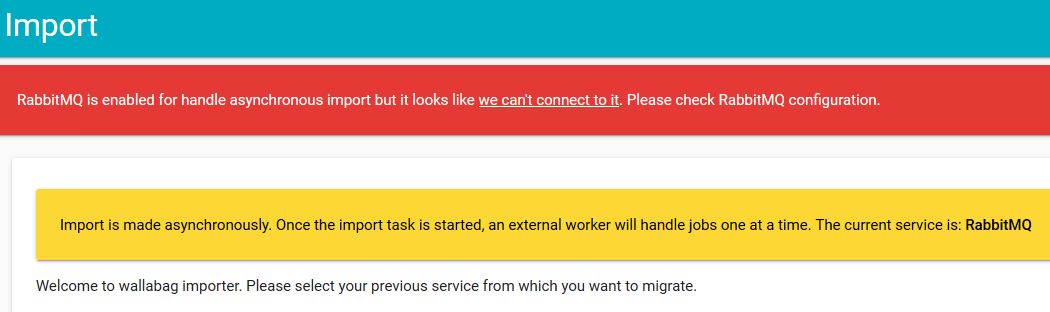
I never actually got rid of it. But after a few hours of senseless poking around, I realized... the import works anyway. Kinda.
But I still needed to set up the RabbitMQ connection. The app/config/parameters.yml contains this section:
parameters:
    (omitted...)
    # RabbitMQ processing
    rabbitmq_host: localhost
    rabbitmq_port: 5672
    rabbitmq_user: guest
    rabbitmq_password: guest
    rabbitmq_prefetch_count: 10
I am using CloudAMQP - an excellent RabbitMQ host. Their free tier has some limitations, but its cap of 1,000,000 messages per month should be more than sufficient for me. However, I also needed to specify vhost, which the config above apparently doesn't have.
When you look at app/config/config.yml, you can find this:
old_sound_rabbit_mq:
    connections:
        default:
            host:     "%rabbitmq_host%"
            port:     "%rabbitmq_port%"
            user:     "%rabbitmq_user%"
            password: "%rabbitmq_password%"
            vhost:    /
            lazy: true
The easiest thing to do was to provide a complete AMQP url, so I changed it to this:
old_sound_rabbit_mq:
    connections:
        default:
            url: "amqp://myurl/myvhost"
            lazy: true
According to the docs:
To apply changes to
parameters.yml, you have to clear your cache by deleting everything invar/cachewith this command:bin/console cache:clear -e=prod.
So I did:
bin/console cache:clear -e=prod
service php7.0-fpm restart
As I mentioned above, the Import page still shows the error, but after I tried importing from Pocket, the second time it worked.
The Import functionality seems to enqueue the links into Rabbit, but you have to start a separate consumer to push them into Wallabag..
bin/console rabbitmq:consumer -e=prod import_pocket -w
I thought I could maybe write a unit to make a few consumers run automatically, but given their horrible tendency to just stop working after a few minutes, I guess there's no point. (They don't really show any error, and the process just hangs. If it died, that'd be better - I could have systemd just restart it. This way I have to notice they are no longer doing anything and kill and restart them manually.
One more thing: even when I checked the checkbox asking whether all imported items should be marked as read, none of them were. So I did that afterwards by running this SQL query:
UPDATE wallabag.wallabag_entry SET is_archived = true;
After so much work, I really hope Wallabag turns out to be useful. 😄
Which is a bit of a shame. This is the kind of project where I might actually want to get involved - but I won't willingly spend any amount of time writing PHP. Call it a very strong distaste. ↩︎


Comments ()