Turn your wired QMK keyboard wireless
This article was my contribution to the latest issue of the Paged Out! zine. More on that here. I'm re-posting it here as well. This probably will be the last keyboard-related post on here for a while.
Maybe you've seen some of the QMK-based keyboard kits and thought: This looks great, but I wish it were wireless. Well, for some cases, there's an easy path to conversion - no extra skills necessary. You will have to rewrite your keymaps in ZMK, though. QMK's wireless support isn't there yet.
Pro Micro-based
The Pro Micro controller board for keyboards got quite popular and now there are many compatible boards that can be used as a drop-in replacement. And some of them also support Bluetooth - such as the (also quite popular) nice!nano v2 (n!n). It has the exact same pins - but also has a few extras for a battery connection with a built-in charging controller. It's 10-15€ more expensive, but well worth it. (The whole upgrade will set you back by 25-35€ at most.)
The n!n is extremely power-efficient; with just a tiny 300mAh battery, it'll run for weeks on a single charge. Unless you add LEDs, of course. If you want to go wireless, it's better to avoid them.
How to go wireless
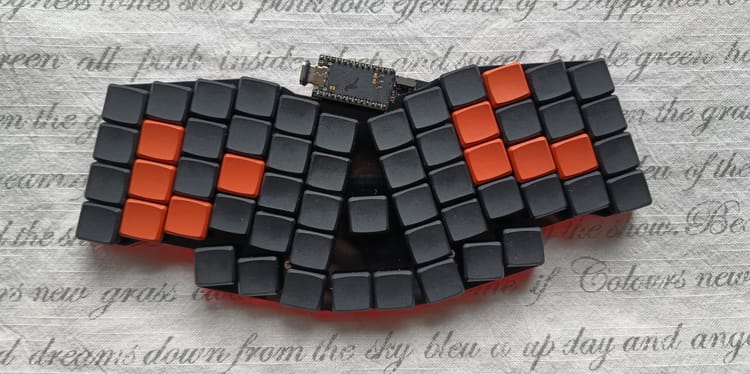
You will need:
- a Pro Micro-compatible, Bluetooth-enabled board, such as the nice!nano v2
- an accumulator, as big as you can physically fit in there, such as the 3.7V 300mAh 601235 LiPo cell
- maybe also taller controller sockets
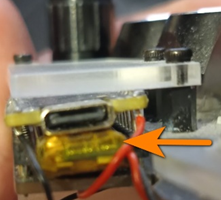
This is the bare minimum, I've tried it, and it works. But if you can, you should also add a JST connector so that you can disconnect the battery easily and a switch to one of the battery leads so you can turn the keyboard off.
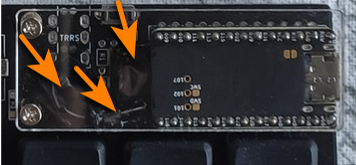
The process is simple: First, assemble the keyboard kit as usual. Second, instead of your Pro Micro controller, use the nice!nano v2. Pay heed to the correct pin placement - the n!n has 1 more contact on each side, so don't mix them up.
Then connect the accumulator, ideally via a tiny switch. Be careful here - don't short the battery leads, or touch them to any pins you're not supposed to, or you'll burn both the battery and the n!n's battery controller.
I heard it happened to a friend, allegedly.
The most difficult question is - where to put the battery?
If you have a keyboard with lots of space between the PCB and the bottom plate, it's easy - just cram a battery in there and you're done. You'll be able to fit a big one in there.
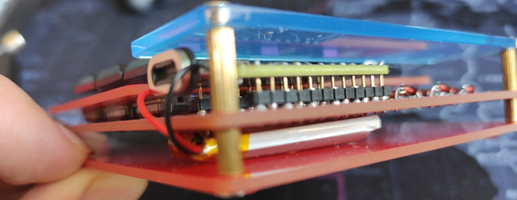
Otherwise, your best bet is to place the battery beneath the controller itself. The 300mAh 601235 I mentioned above is perfect for this because it fits between the n!n's pins. If you use tall enough sockets, you can put it right under the controller.
When you take a black sharpie to any protruding bits of the accumulator or wires, you won't even notice this mod at a glance.
Firmware
This will either be a breeze or the most difficult part. If there is no existing definition for your specific keyboard yet, you'll have to figure it out with some work. Folks at ZMK's Discord are wonderful and with their help even I eventually managed to submit a pull request with a definition for one of the keyboards above.
But for many of the popular boards, ZMK firmware alternatives are already submitted. Chances are you'll only need to follow the tutorial, select your keyboard from the options, wait for the firmware to build (no local installation needed), and flash it onto your keyboard over USB.
You're done. Enjoy.


Comments ()