Using KeePass with Firefox (or Chrome)
Update 17. 1. 2018: see the bottom of the article
Update 9. 6. 2019: The links to PassIFox are dead now. Please use KeePassHttp-Connector only. I'm striking out the links to it in this article. Thanks, Jeremie, for pointing it out to me.
After a long time of using both KeePass and (synced) Firefox password manager to store my passwords, I wanted to find out whether I can use KeePass for both. I ended up liking this setup, so here's how you can replicate it.
The entire process has these main steps:
- Export passwords from Firefox,
- Import them into KeePass,
- Install a couple of necessary plugins,
- Connect Firefox to KeePass.
If you'd rather explore on your own, see the bottom of this post for a shortened version of the process, with links.
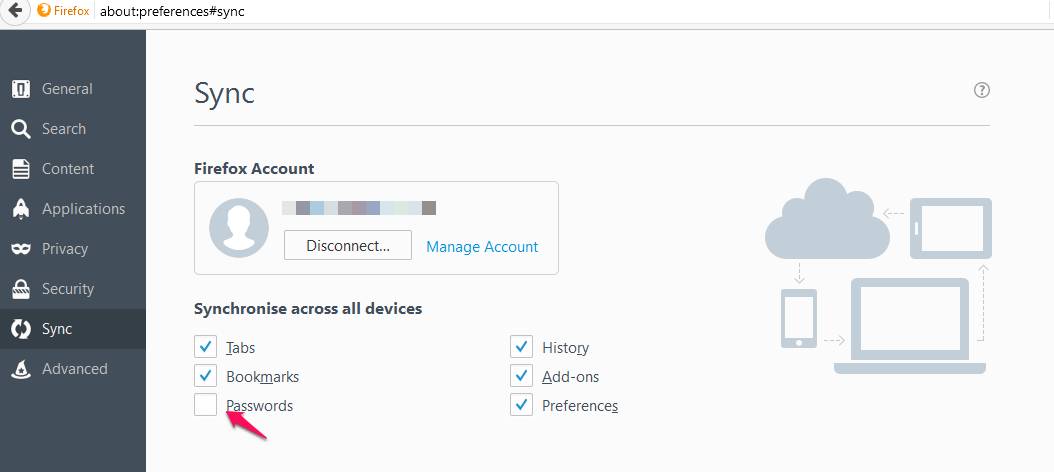
0. Consider turning off Firefox's Password Sync feature.
I'd been using Firefox's Sync feature for Passwords for a long time. After connecting FFox to KeePass, I've encountered some weird behaviour. It probably can be fixed - the PassIFox's page says it should work - but I've realized that since I'm now using KeePass as a master database, there is no reason to upload them to Firefox's servers, as well. So I've just disabled it. You can do it in Sync settings.
1. Export passwords from Firefox
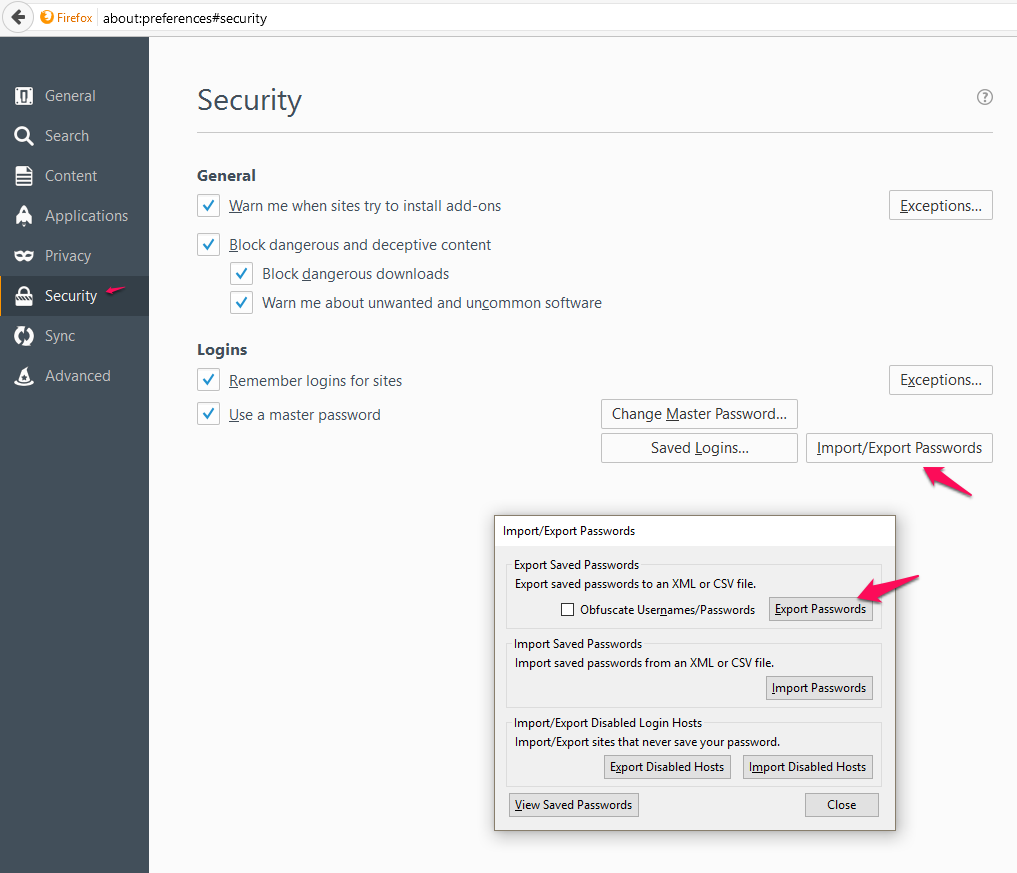
I've used this addon. Simply install it (doesn't require a browser restart), go to Firefox's Settings, click Security, where you should now see a button saying Import/Export Passwords. Click it, then simply click Export Passwords (no obfuscation needed) to the default XML format. You should get a file called something like password-export-2017-02-23.xml. Save it somewhere.
2. Import passwords to KeePass
Install Firefox to KeePass Password Importer.
I've installed the extension according to instructions (copy-paste into the Plugins folder, which required admin privileges), but haven't been able to get it to import from Firefox directly - it either ended with an error, or crashed KeePass completely.
That's why, in the step above, you've exported your passwords into an XML.
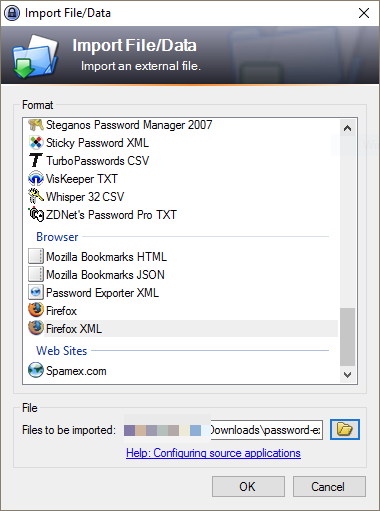
You have to close KeePass and launch it again in order to load the plugin. Then go to File | Import, select Firefox XML (at the bottom of the list), browse to your exported XML file and confirm.
Another screen will pop up.
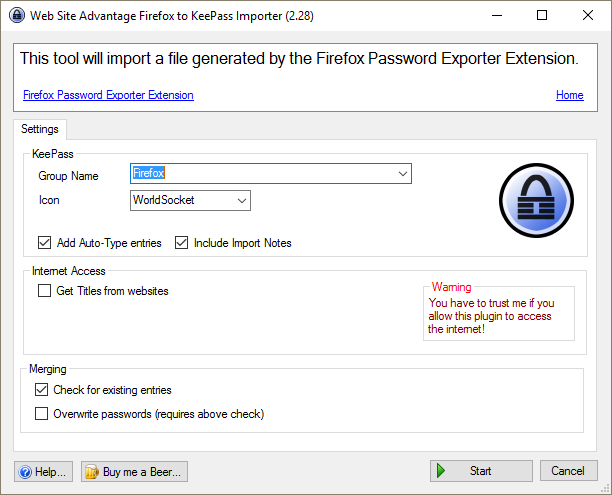
After clicking Start, you should get a pop-up saying how many entries were imported.
3. Uninstall plugins you no longer need
If everything seems okay, I suggest you exit KeePass again and delete the PW Exporter plugin, since you won't be needing it again.
Also uninstall the Password Exporter add-on from Firefox.
4. Install KeePass HTTP
If you are on Windows and use Chocolatey, you can install it with:
choco install keepass-keepasshttp -y
If not, manual install instructions are at its home page. (But maybe check Chocolatey out. ;)
This step of the process was the reason I was wary of this setup at first - I didn't want all my sensitive data exposed over some silly, unprotected interface. But after some reading and experimentation, it seems that it really does encrypt everything with AES.
5. Install the PassIFox add-on (or KeePassHttp-Connector)
PassIFox connects Firefox to KeePass using the KeePassHttp interface, and completely replaces the built-in Firefox password store with KeePass. (It also does some other things, which are not relevant for now, but are definitely worth checking out.)
Update: as mentioned at the start of the article, please use KeePassHttp-Connector instead.
After you install the plugin, you are prompted to restart Firefox. When you do so, you should be prompted to connect to KeePass.
Make sure your KeePass is running and unlocked, and click Connect in Firefox. KeePass should display a prompt with Firefox's new encryption key and ask you to give it a name. Once you confirm it, you're done. You can verify everything works by going into Firefox's Options -> Security and clicking Saved Logins.... a list of your logins, now loaded from KeePass, should appear.
6. Wrapping up
I've also removed Firefox's master password. Since FFox doesn't store any passwords any more, and only can access them if KeePass is unlocked, I don't see the point of keeping it. (Please let me know if I'd just opened some glaring security hole. 😇)
There now should be an entry called KeePassHttp Settings in your KeePass database's root element, storing your browser's encryption key. Any new passwords saved from the browser are stored in a folder called KeePassHttp Passwords. If any of these two entries can be renamed, I haven't found out how, yet.
That's about it. So the tl;dr version of the entire process is:
- Export passwords from Firefox with the Password Exporter, and delete the add-on afterwards.
- Download the Password importer plugin for KeePass, import the passwords exported in step 1., and delete the plugin
- Install KeePassHttp with
choco install keepass-keepasshttp - Install PassIFox
- Connect PassIFox to KeePass when prompted
and you're done.
Update 17. 1. 2018: more security considerations
As Nikolaus Demmel pointed out to me (thanks!), just disabling your master password without deleting the passwords first might leave them on your disk in unencrypted form. This article mentions the files that store them: key3.db and logins.json - you could just delete them. Or you could disable PassIFox, restart Firefox, open its Password manager - and if there's anything there, delete it. (Then enable PassIFox and restart again.)
Also note that if you're using Firefox Quantum, the original PassIFox is probably incompatible and you might want to use a different one. I now use KeePassHttp-Connector, which integrates with Firefox in a different way and doesn't completely replace the built-in password manager, so disabling the plugin is not necessary.

Comments ()